AeroPress-style coffee basics for small kitchens are mostly about making a compact routine easy to repeat. You do not need a large coffee bar, a complicated recipe notebook, or every accessory on the shelf. You need a clear place to brew, a simple dose, a grind that is close enough, and a cleanup habit that keeps the counter from feeling crowded.
This method suits small kitchens because the brewer, filters, scoop, and mug can live in a narrow bin or drawer. The tradeoff is that the routine happens in your hands. Water amount, grind, steep time, stirring, and pressing all affect the cup, so beginners get better results when they change one variable at a time.
The goal here is not a competition recipe. It is a calm beginner workflow for a good daily cup in a tight space, with enough structure to help you notice what to adjust next.
Why This Matters
Small kitchens punish messy routines. If your brewer pieces are scattered, the filter cap is still wet, or the used coffee puck has nowhere to go, a quick morning brew can feel like a full cleanup project. That is why setup matters as much as flavor for AeroPress-style coffee basics for small kitchens.
AeroPress explains in its own brewing help that the brewer lets users control variables such as water temperature, brew time, and coffee-to-water ratio. That flexibility is useful, but it can also overwhelm a beginner. Start with one repeatable recipe, then adjust after tasting. You can read AeroPress's own overview of brewing variables on its official brewing help page.
The Specialty Coffee Association is also a useful reference point for coffee terminology and professional education. For a beginner at home, the practical lesson from specialty coffee culture is simple: measurement and consistency make troubleshooting easier. The broader organization can be found at the Specialty Coffee Association.
Start With a Small-Kitchen Brewing Zone
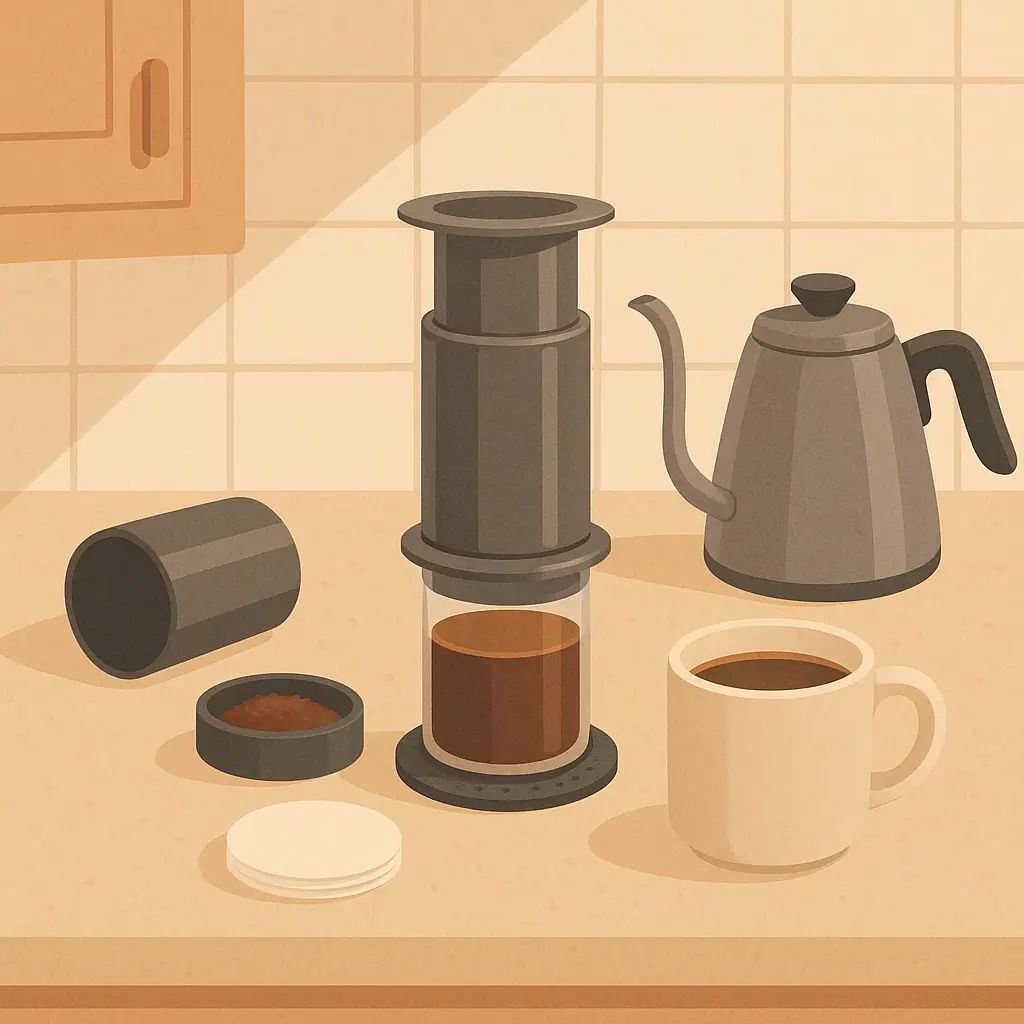
Before choosing ratios or accessories, give the routine a small home. A shallow bin, a narrow tray, or one drawer section can hold the brewer chamber, plunger, filter cap, paper filters, scoop, and stirrer. Keep it close to the kettle or sink if possible, but not so close that wet pieces sit in the main prep area.
A good small-kitchen setup has three zones: dry storage before brewing, a safe place to press, and an easy path to cleanup. The pressing surface should be sturdy and comfortable. Avoid balancing the brewer on a delicate glass, a narrow mug, or anything that wobbles.
Keep the kit lean
For the first week, use only the brewer, filters, coffee, water, mug, and a timer. A scale is helpful, but not required to learn the routine. Add tools only when they solve a problem you can name.
Plan the wet pieces
After brewing, the cap, filter, and grounds need somewhere to go. Put a small compost bowl, trash bowl, or sink-side rinse area nearby before you brew. That single step keeps the counter calmer.
What to Check First for AeroPress-Style Coffee Basics
Beginners often jump straight into recipe details. First, check the practical pieces that decide whether the routine is comfortable enough to repeat.
- Mug stability: use a sturdy mug or server that fits the brewer securely before pressing.
- Filter supply: keep paper filters dry and easy to reach so you are not searching mid-brew.
- Grind size: start around medium-fine and adjust after tasting rather than changing several things at once.
- Counter path: make sure the kettle, brewer, mug, and trash or compost spot are within a few steps.
- Storage space: choose one container for the whole kit so the brewer does not migrate across the kitchen.
How to Brew AeroPress-Style Coffee Step by Step
This is a simple starting workflow, not the only correct recipe. Use it to build a baseline, then adjust for your beans, grinder, and taste.
- Set up the mug and brewer: place a paper filter in the cap, attach it securely, and set the brewer on a stable mug or server.
- Add coffee: use one consistent scoop or a weighed dose if you own a scale. Consistency matters more than a perfect number on day one.
- Add hot water carefully: pour enough water to wet all grounds, then stir gently so dry pockets do not remain.
- Steep briefly: let the coffee sit for your chosen time. Use the same time for the first few brews so tasting notes mean something.
- Press steadily: press with slow, even pressure. If it feels unusually hard, stop and check grind size or filter placement next time.
- Dilute if needed: if the cup is too strong, add hot water after brewing rather than changing the whole recipe immediately.
- Clean while warm: remove the cap, push out the puck, rinse the parts, and let them dry before returning them to storage.
Common AeroPress-Style Mistakes to Avoid
The most common mistakes are not dramatic. They are small routine leaks: a grind that is too fine, a press that feels forced, a filter cap that was not tightened well, or wet parts stored in a closed bin.
- Pressing on an unstable cup: this creates spill risk and makes the method feel more stressful than it should.
- Changing every variable: if the cup tastes weak, adjust one thing first, such as grind or dose, not everything.
- Ignoring cleanup: old coffee oils and trapped moisture can make the kit smell stale.
- Buying accessories too early: extra caps, metal filters, and stands help only if they solve a real workflow problem.
- Using force as feedback: hard pressing often points to grind, filter, or setup issues. Do not treat it as normal.
A Simple Checklist
Use this quick check before brewing, especially if your kitchen is tight or shared.
- Stable mug ready? The brewer should sit flat and secure.
- Filter in place? Check the cap before adding coffee.
- One recipe chosen? Repeat the same dose, water, and time for a few cups.
- Cleanup path clear? Know where the used grounds and wet parts will go.
- Storage dry? Let parts air-dry before closing them inside a bin or drawer.
Pros and Cons
Very compact footprint
The brewer and filters can fit in a small drawer, bin, or coffee cart without taking over the counter.
Flexible cup strength
You can brew stronger and dilute, or brew milder, once you understand your baseline recipe.
Fast cleanup when planned
A clear rinse-and-dry habit makes the method friendly for busy mornings and shared kitchens.
Technique affects the cup
Small changes in grind, stir, steep time, or pressing can make results feel inconsistent at first.
Needs a sturdy pressing spot
The brewer works best when the mug or server is stable, which matters in crowded kitchens.
When to Get Extra Help
If the brewer is difficult to press, leaks around the cap, or behaves differently from the instructions that came with your model, check the manufacturer's current help pages before guessing. Parts, accessories, and model sizes can vary.
If flavor is the issue, get help by simplifying your notes. Write down coffee amount, grind setting, water amount, steep time, and what tasted wrong. That makes advice from a local roaster, knowledgeable friend, or coffee community more useful.
Frequently Asked Questions
What should I check first in AeroPress-style brewing?
Check mug stability, filter placement, and cleanup space before changing the recipe. A safe, repeatable setup comes first.
How often should I review my recipe?
Review it after three similar brews. That gives you enough repetition to notice whether the issue is strength, grind, time, or cleanup.
What should I do if I am not sure about a part or accessory?
Check the official instructions for your exact brewer or ask a trusted coffee retailer before buying extra parts.
Can I undo recipe changes later?
Yes. Most brewing changes are easy to reverse if you keep notes and change only one variable at a time.
Final Thoughts
AeroPress-style coffee basics for small kitchens work best when the routine is compact, stable, and easy to clean. Start with a lean kit, use one baseline recipe, press on a sturdy mug, and clean the parts before they become clutter.
Once that habit feels automatic, improve one detail at a time: grind a little finer, adjust steep time, add a scale, or create better dry storage. Better coffee comes from a repeatable nook, not from making the setup bigger than your kitchen needs.